
A functional air conditioning system is crucial for comfort and health in warm weather. While major breakdowns need a professional, many common AC problems can be fixed with simple DIY troubleshooting.
Understanding your system basics and performing routine checks saves time and money. This guide provides practical tips to keep your cooling system efficient and often allows you to handle basic air conditioner repair yourself.
Checking the Thermostat and Power Supply
The simplest fix is often the most overlooked: the thermostat. Ensure it is set to “Cool” and that the temperature setting is lower than the current room temperature.
Check that the fan setting is on “Auto” or “On.” If the thermostat is battery-powered, replace the batteries, as weak power can lead to inaccurate readings or communication failures. Next, verify the power supply.
A tripped circuit breaker is a common culprit for a non-functional unit. Locate your main electrical panel and check the breaker dedicated to the AC unit (often labelled “AC” or “Furnace”). Reset it if it is in the “Off” or middle position.
Cleaning or Replacing Air Filters: Essential for Air Conditioner Repair
Dirty air filters are the number one cause of reduced efficiency and many operational problems. A clogged filter restricts airflow, forcing the AC unit to work harder, which can lead to the evaporator coil freezing up.
Check your filters monthly and replace or clean them every one to three months, depending on the filter type and household usage (pets or heavy dust).
This simple task is a critical step in effective air conditioner repair and maintenance that can immediately improve cooling performance and air quality.
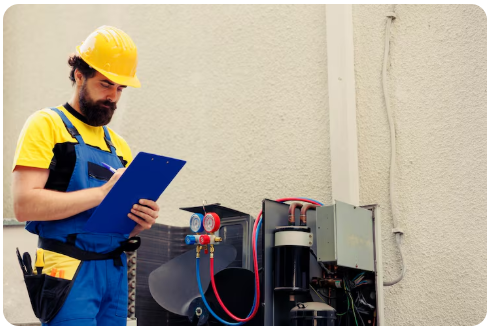
Clearing Debris from the Condenser Unit: Vital for AC Repair
The outdoor condenser unit, which houses the compressor and condensing coil, needs a clear perimeter to dissipate heat effectively. Over time, leaves, grass clippings, dirt, and shrubbery can accumulate around the unit, blocking airflow.
Turn off the power to the unit at the disconnect box located near the condenser (or at the main breaker). Then, carefully clear away any debris for at least two feet around the unit and gently wash the exterior fins with a garden hose. Ensuring unobstructed airflow is a fundamental part of reliable ac repair.
Inspecting the Evaporator Coil and Drain
If your unit is running but not cooling effectively, the indoor evaporator coil might be frozen, usually indicated by ice visible on the refrigerant lines. This requires immediate attention. Turn the unit off and let the ice melt naturally. Once thawed, check the condensate drain line.
This line removes humidity (water) from the system. If it becomes clogged with algae or dirt, water backs up, often triggering a safety shut-off switch. You can often clear a minor clog by gently pouring a cup of distilled vinegar mixed with water into the drain line access port, if available.
Listen for Strange Noises and Smells
Unusual operational cues are often the first signs of a looming problem. Listen for grinding, squealing, or rattling sounds, which can indicate loose parts, a failing motor, or a bad belt.
Never ignore a burning smell, which usually signals an electrical issue or an overheated component. Foul, musty smells often point to mold or mildew growth in the ductwork or on the evaporator coil.
Addressing these sensory warnings quickly can prevent catastrophic component failure and keep a small issue from requiring extensive air conditioner repair.